

Project description
Pinout:
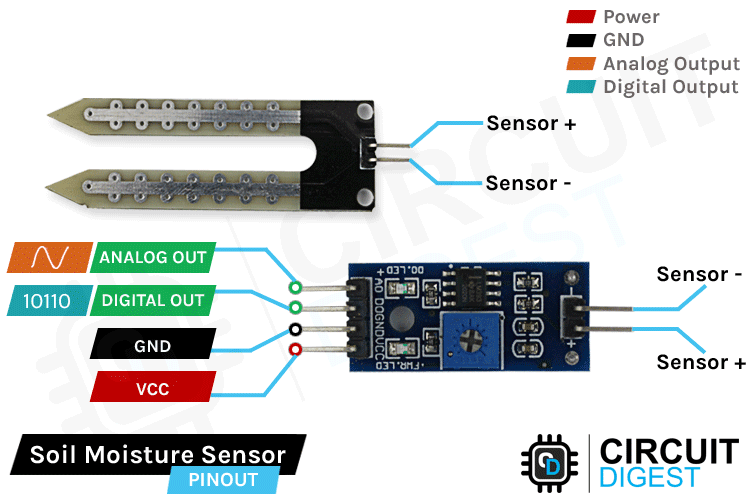
Alright, so when it comes to our soil moisture sensor, we're talking about four pins here: VCC, GND, Aout, and Dout. VCC, that's the power source, it's what keeps this whole operation running smoothly. Then we've got GND, which is your classic ground pin, providing stability to the system. Now, Aout, that's where the magic happens - it gives us analog data, telling us all about the moisture levels in the soil. And last but not least, Dout, that's the digital data pin, giving us binary info about the soil moisture status
Parts Marking:

when it comes to the components of our soil moisture sensor setup, we're looking at two main parts: the sensor probe and the electronic module. The sensor probe is where the action happens - it's got these two big conductive pads that act like little detectives, sniffing out the moisture in the soil. Think of it as the frontline soldier in our moisture-measuring mission. Then, we've got the electronic module, which is like the brain behind the brawn. It takes the data from the probe and processes it into something we can understand,
Working Animation:

our soil moisture sensor: when we stick it in the soil, it checks how much water's in there. The probe has these two metal bits that measure how easily electricity can flow through the soil. More water means easier flow, less water means it's a bit tougher. The sensor then tells us what's up with the soil moisture. It's like having a little meter to check if your plants need a drink!
Circuit Diagram:
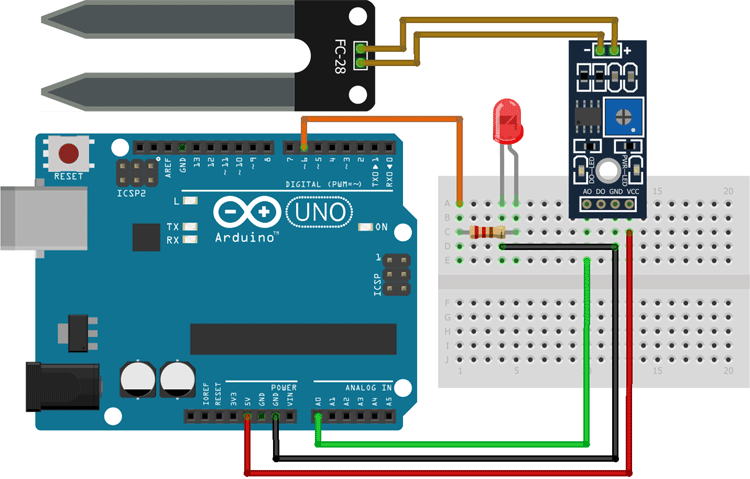
We've got our soil moisture sensor, which is like the starting point. It has these four pins: VCC, GND, Aout, and Dout. VCC and GND are like the power stations - they give juice to the sensor. Aout and Dout are where the data comes out - one gives analog data, the other gives digital.
Now, we connect the sensor to Arduino, our trusty sidekick. We give power to VCC and GND from Arduino, so the sensor can do its thing. Then, we hook up Aout to one of Arduino's analog pins and Dout to one of its digital pins.

0 Reviews
Your rating