

Cardboard Gesture Recognition with Embedded AI
An example showing how to easily add AI to an Arduino project using NanoEdge AI Studio

Components and supplies

Apps and platforms

Project description
easily add AI to a project , without any knowledge in this field, using the software $ NanoEdge AI Studio $ and its Arduino compatible libraries!
This tutorial guides you through building a cardboard touchpad that relies on vibration analysis and an Embedded AI algorithm running on an Arduino UNO R4 . The UNO emulates a USB keyboard device.
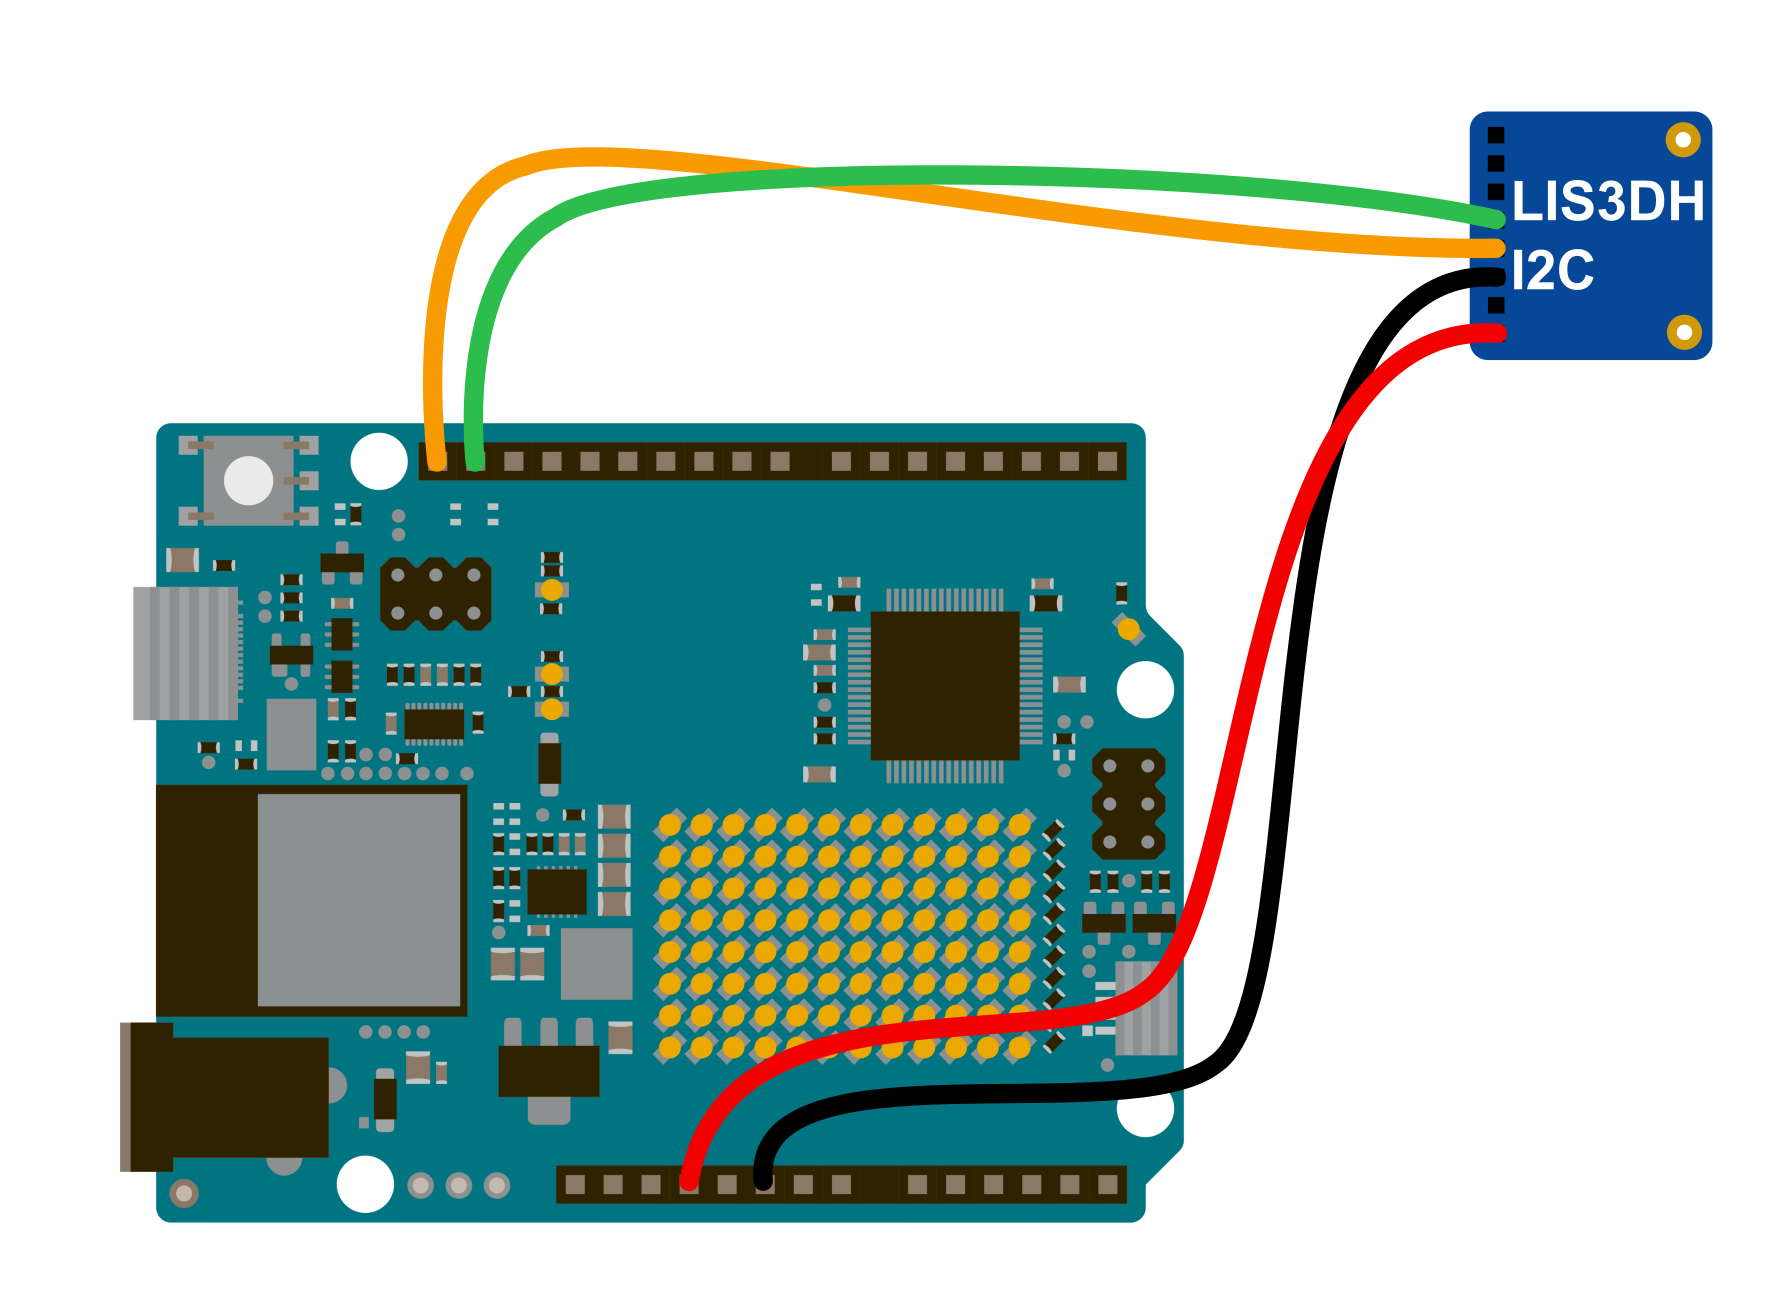
Vibration data from the cardboard is captured using a basic accelerometer connected via the Qwiic connector. Within the UNO microcontroller, vibrations are classified using a NanoEdge AI library.
Based on the detected class, the touchpad triggers either a "PageUp" or "PageDown" keystroke.
Hardware:
- Arduino UNO R4 Wifi
- LIS3DH Triple-Axis Accelerometer (any accelerometer should work)
Software:
- Arduino IDE (for Windows user, you may want to use the 1.8.19 desktop version)
- NanoEdge AI Studio
NanoEdge AI Studio:
NanoEdge is a free machine learning software developed by STMicroelectronics which allow to easily create and integrate AI libraries to any cortex M microcontroller. Essentially, select a project type, import data locally, run a benchmark to find the best model automatically, test the model if you want and get an AI library.
In Nanoedge AI Studio, four kinds of projects are available, each serving a different purpose:
- Anomaly detection (AD): to detect a nominal behavior and an abnormal one. Can be retrained directly on board.
- 1 class classification (1c): Create a model to detect both nominal and abnormal behavior but with only nominal data. (In case you cannot collect abnormal examples)
- N class classification (Nc): Create a model to classify data into multiple classes that you define
- Extrapolation (Ex): Regression in short. To predict a value instead of a class from the input data (a speed or temperature for example).
Steps:
Open Arduino IDE and create a new project:
- Copy data logger source code available below.
- Click on Sketch > Include Library > Adafruit_LiS3DH to install the library.
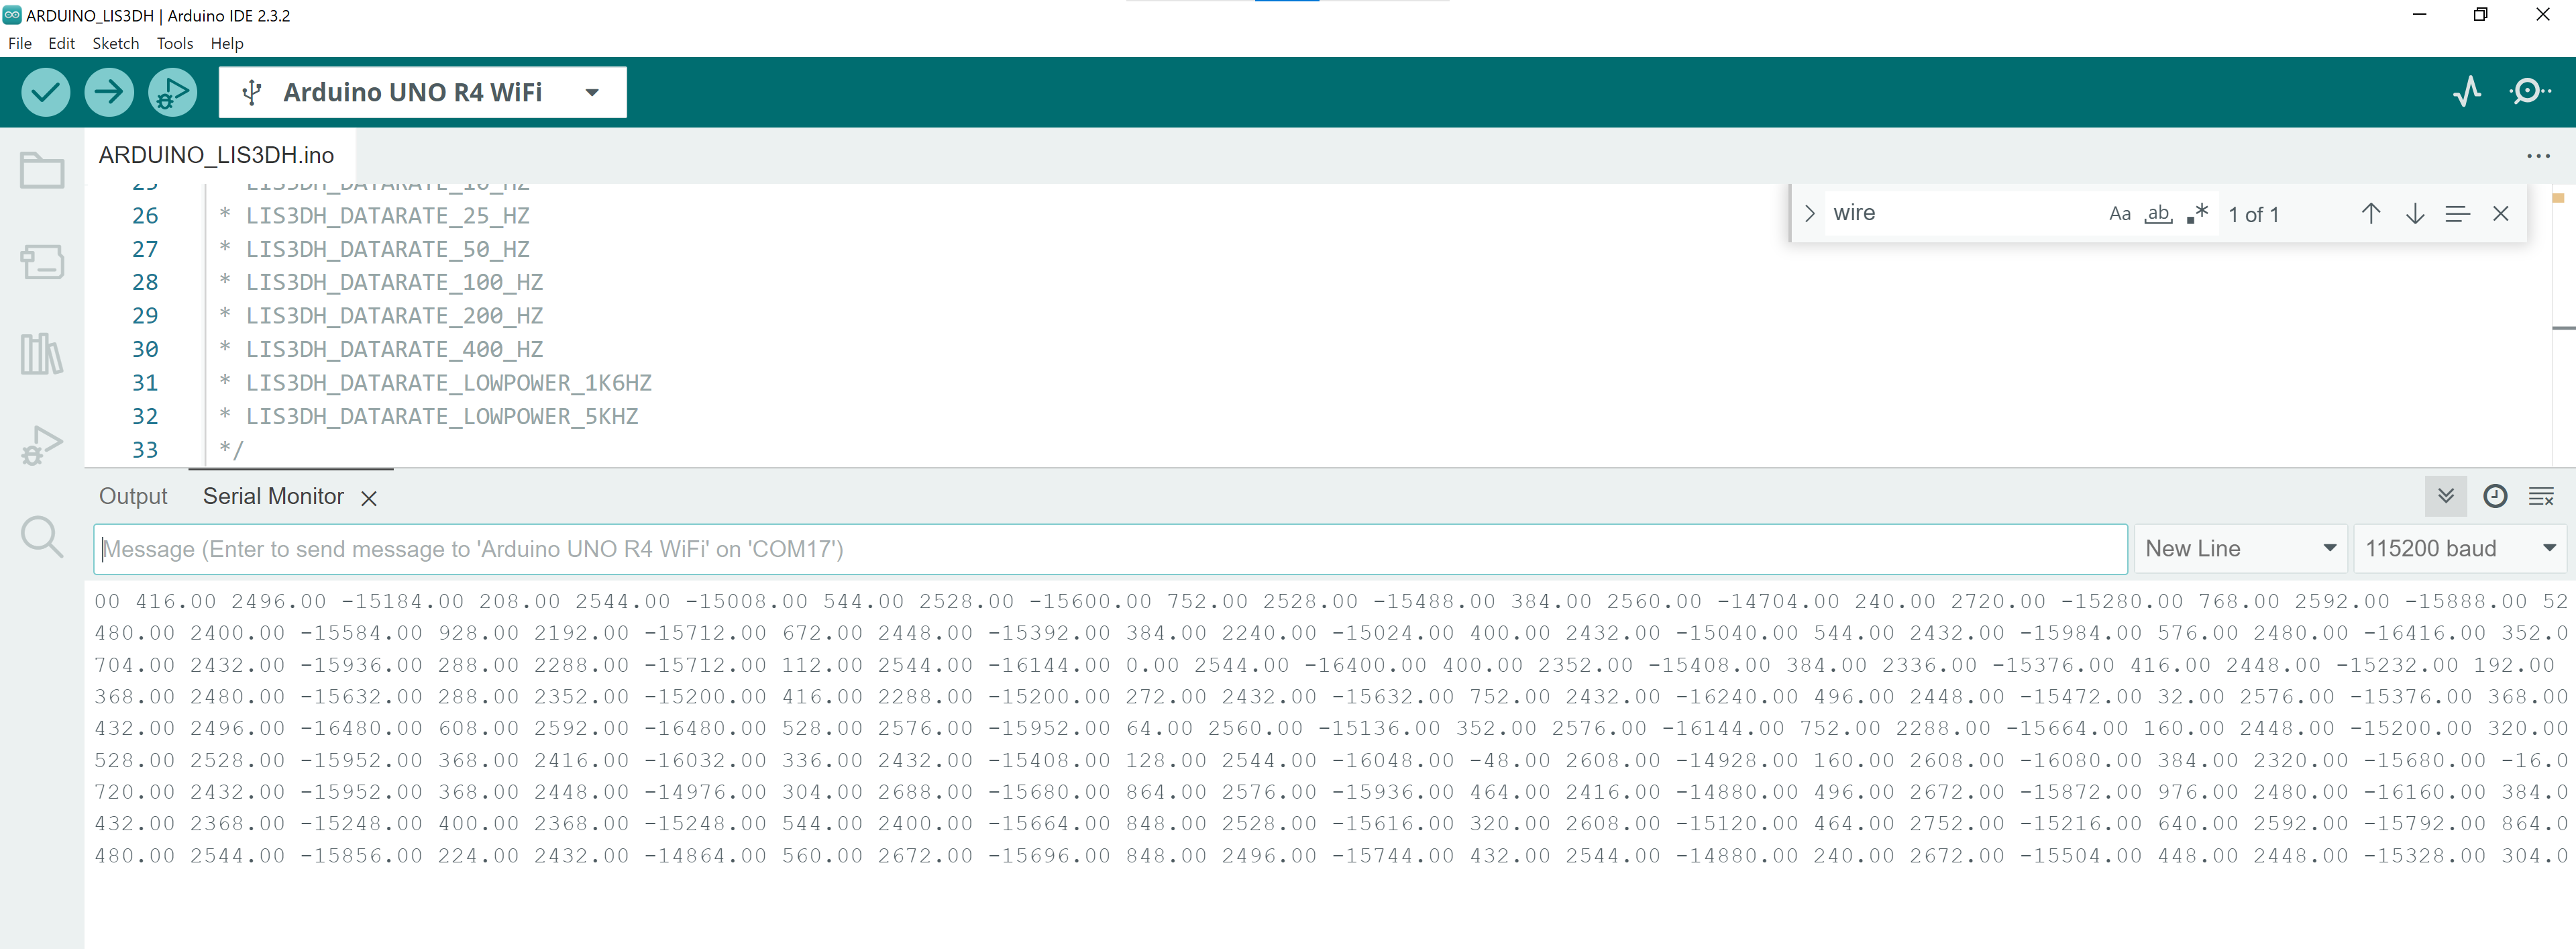
Be careful : If your board is emulating a keyboard, you need to double press the reset button to be able to flash it.
Open the serial in Arduino IDE to check that the accelerometer data is correctly coming to your computer. (don't forget to close the serial after that)
Now we will automatically create an AI model able to recognize classes of gestures using vibration patterns.
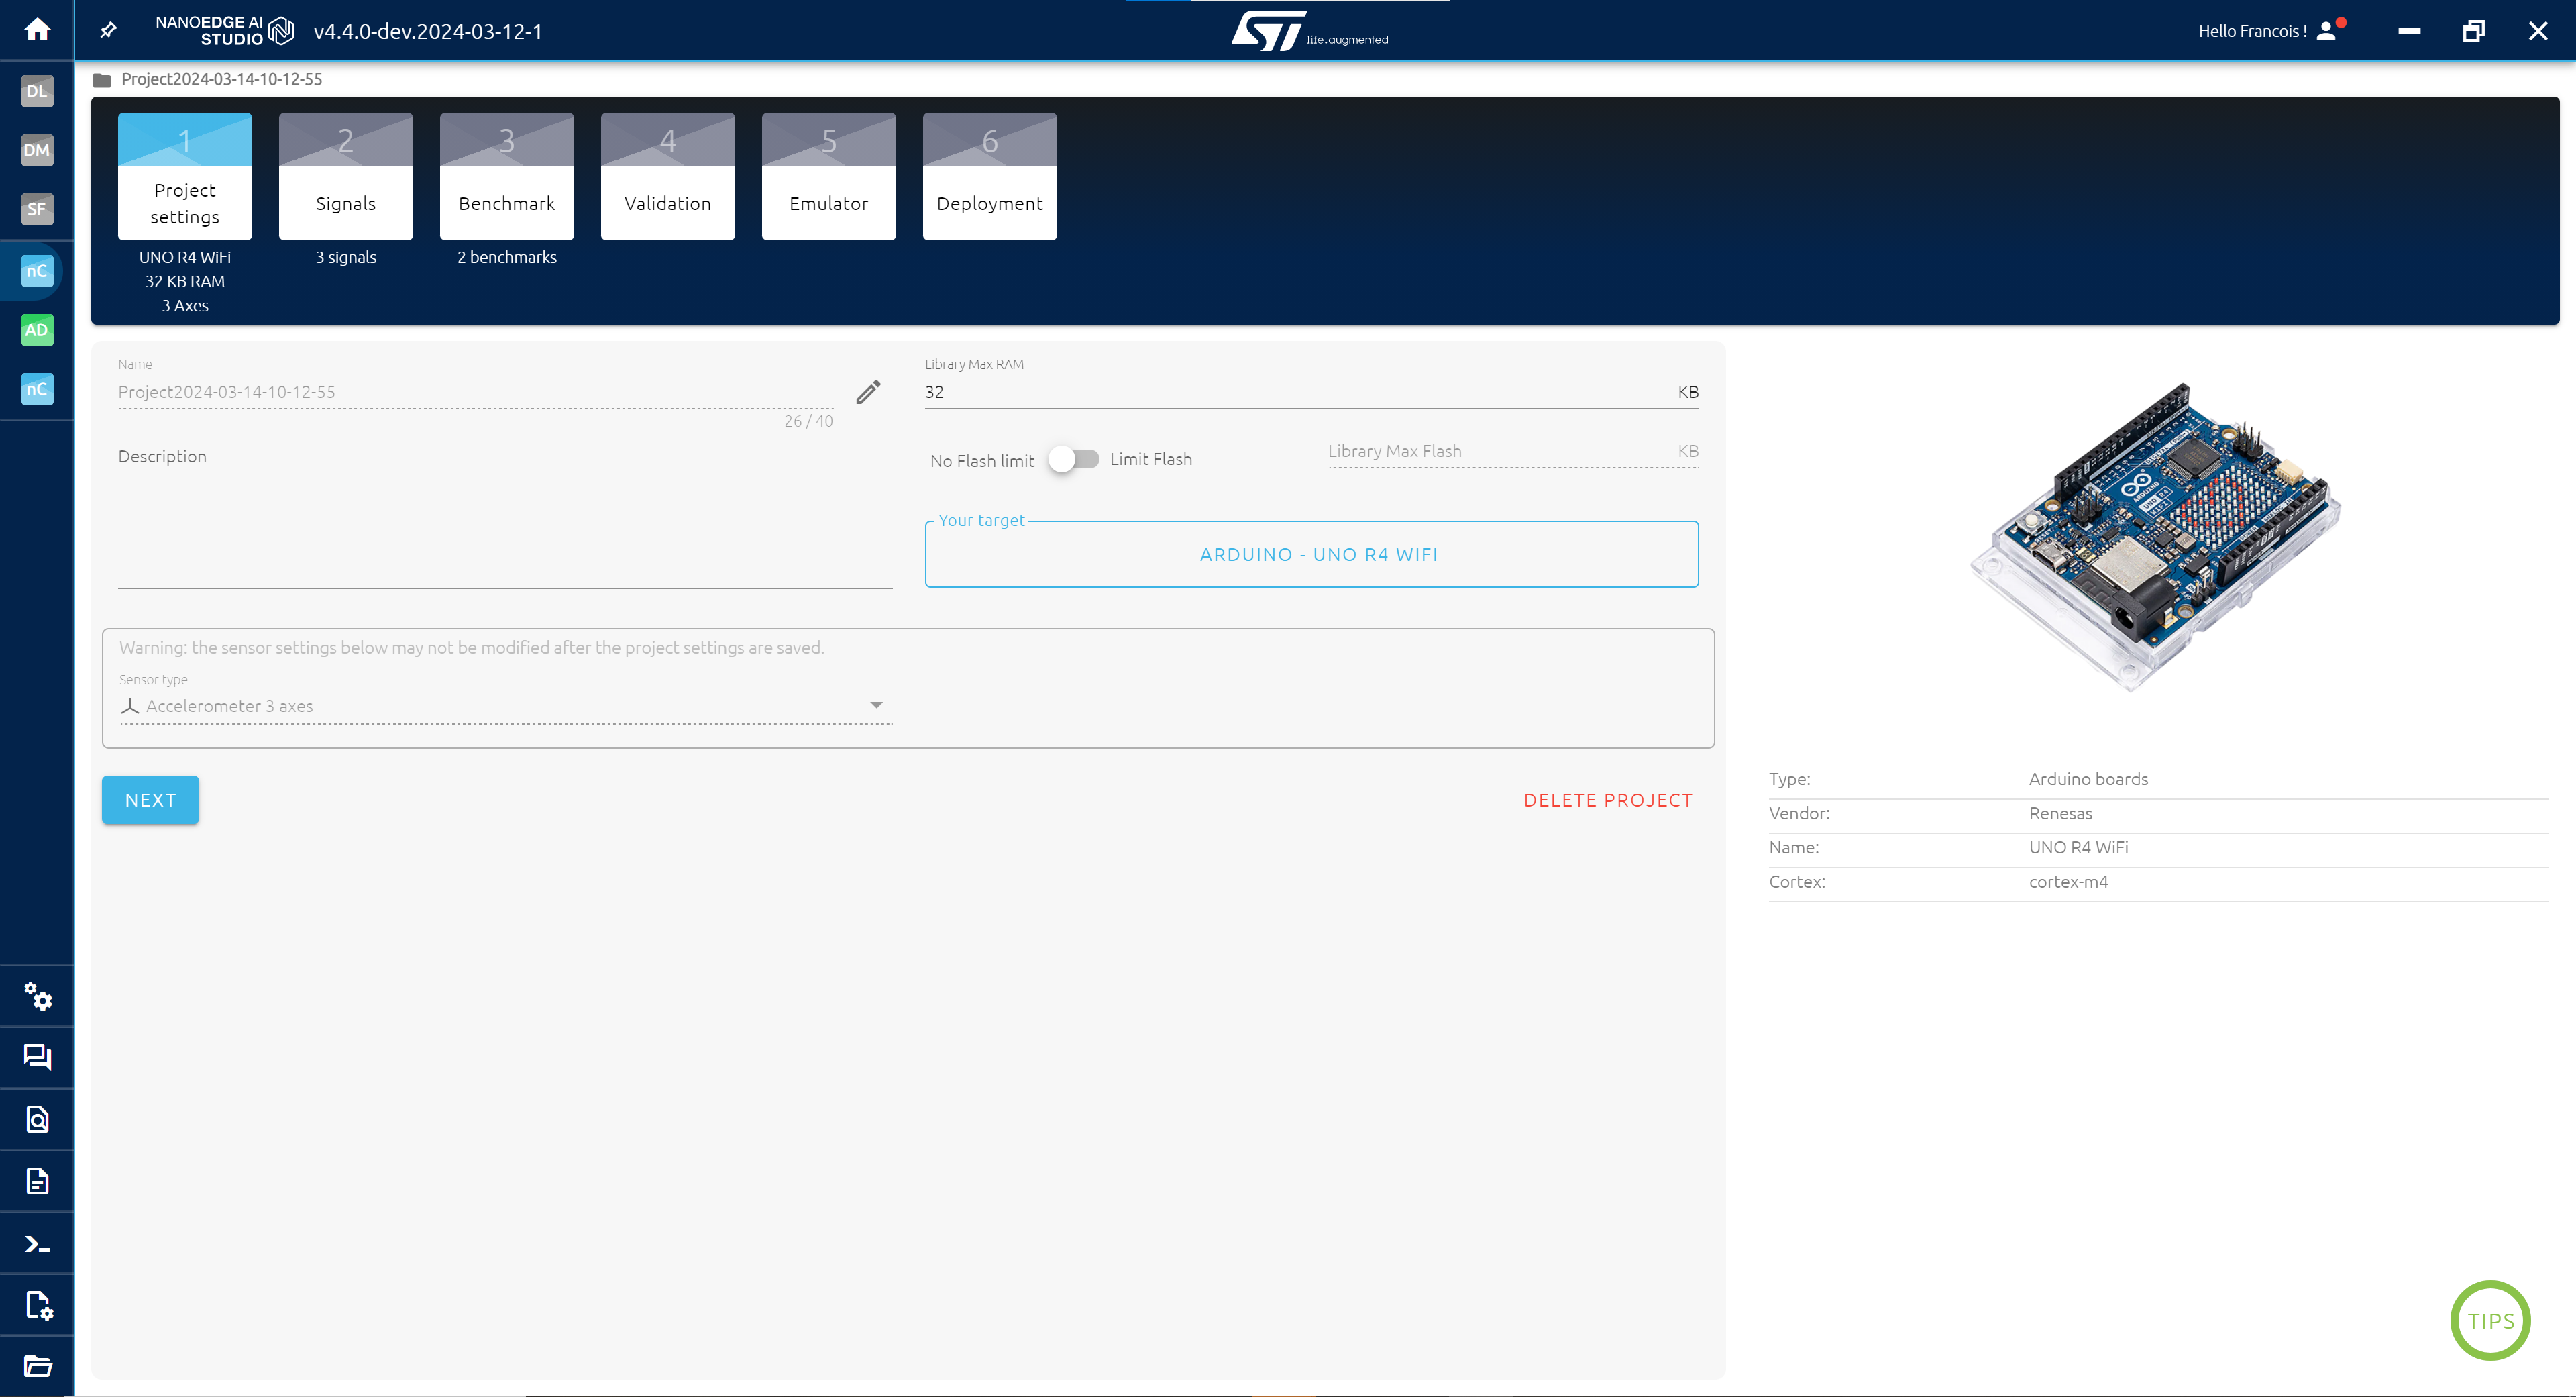
Open NanoEdge AI Studio and create a new " N-Class Classification " project.
In project settings:
- Set target to "UNO R4 Wifi"
- Sensor to 3-axes accelerometer
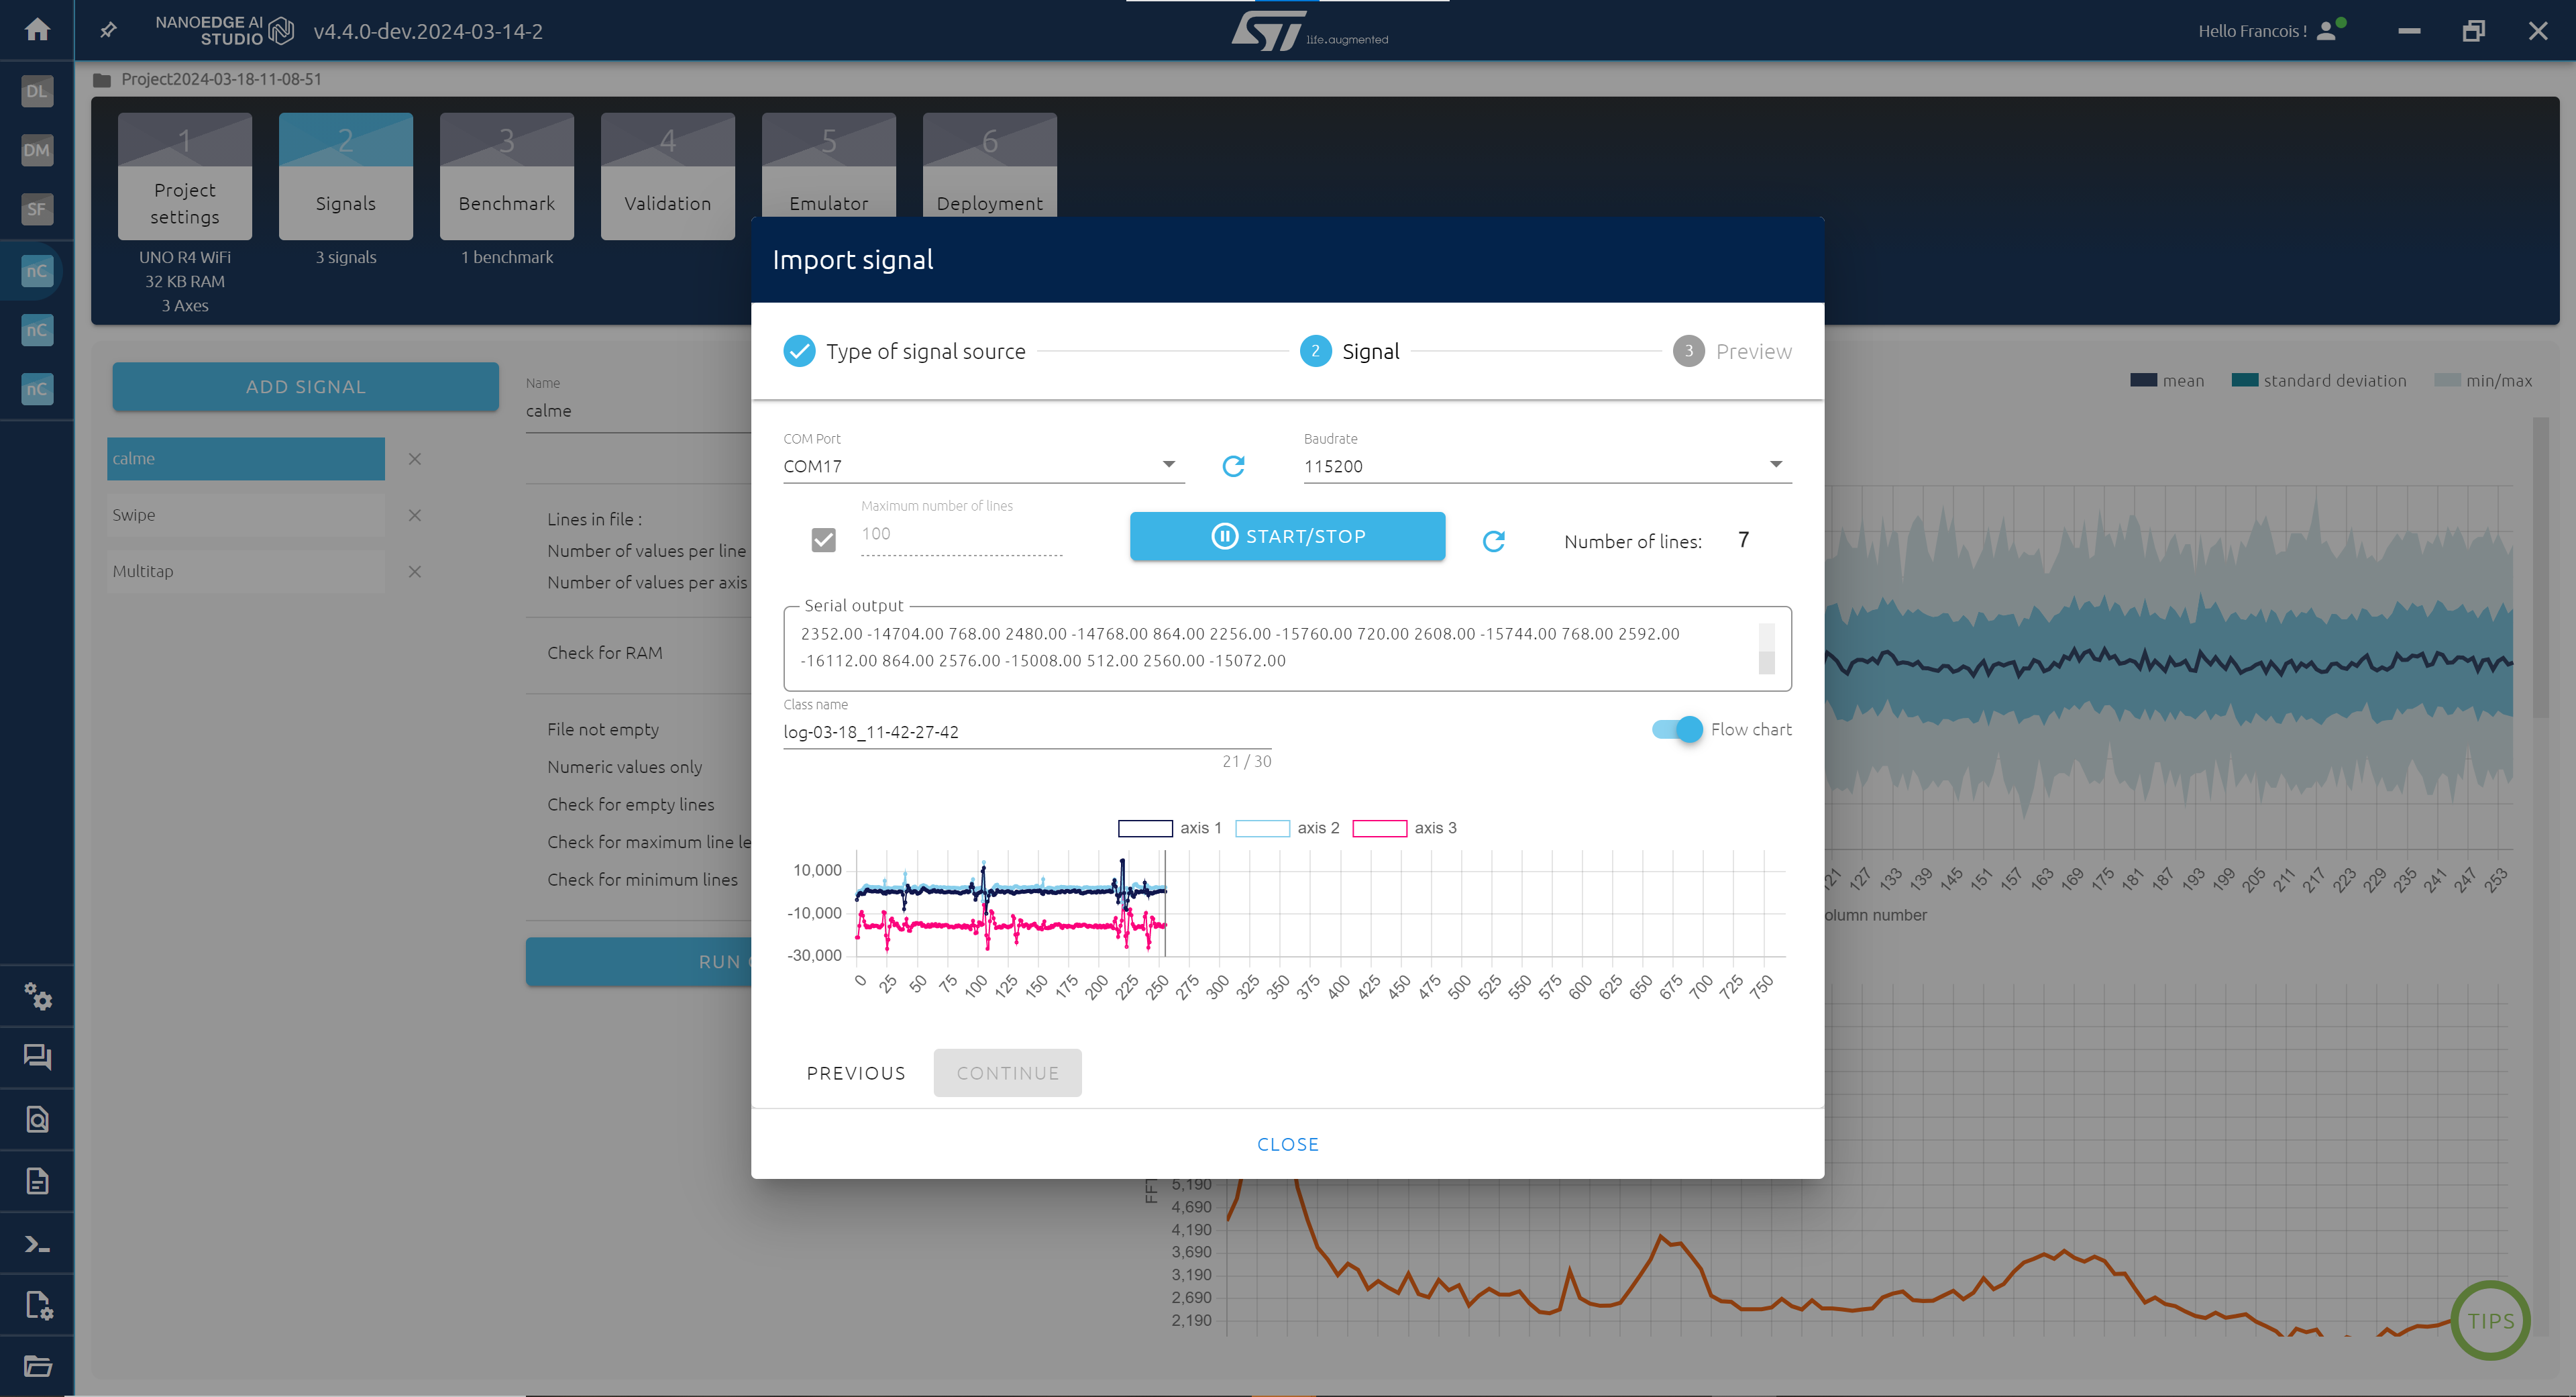
In the Signal step , collect one dataset per class ("Nothing","Swipe","Multitap" or any gesture that you want) using serial port.
Collect one kind of gesture per dataset!
Here is how to proceed:
- Make sure the board is connected to the pc with the data logger code flashed on it
- Click ADD SIGNAL > FROM SERIAL
- Make sure to select the right come port
- Click START/STOP to collect data (100 buffers per signal should be enough)
- Once finished click CONTINUE and then IMPORT
If everything is correct, you should see a new dataset added with plots and information.
Create the AI model:
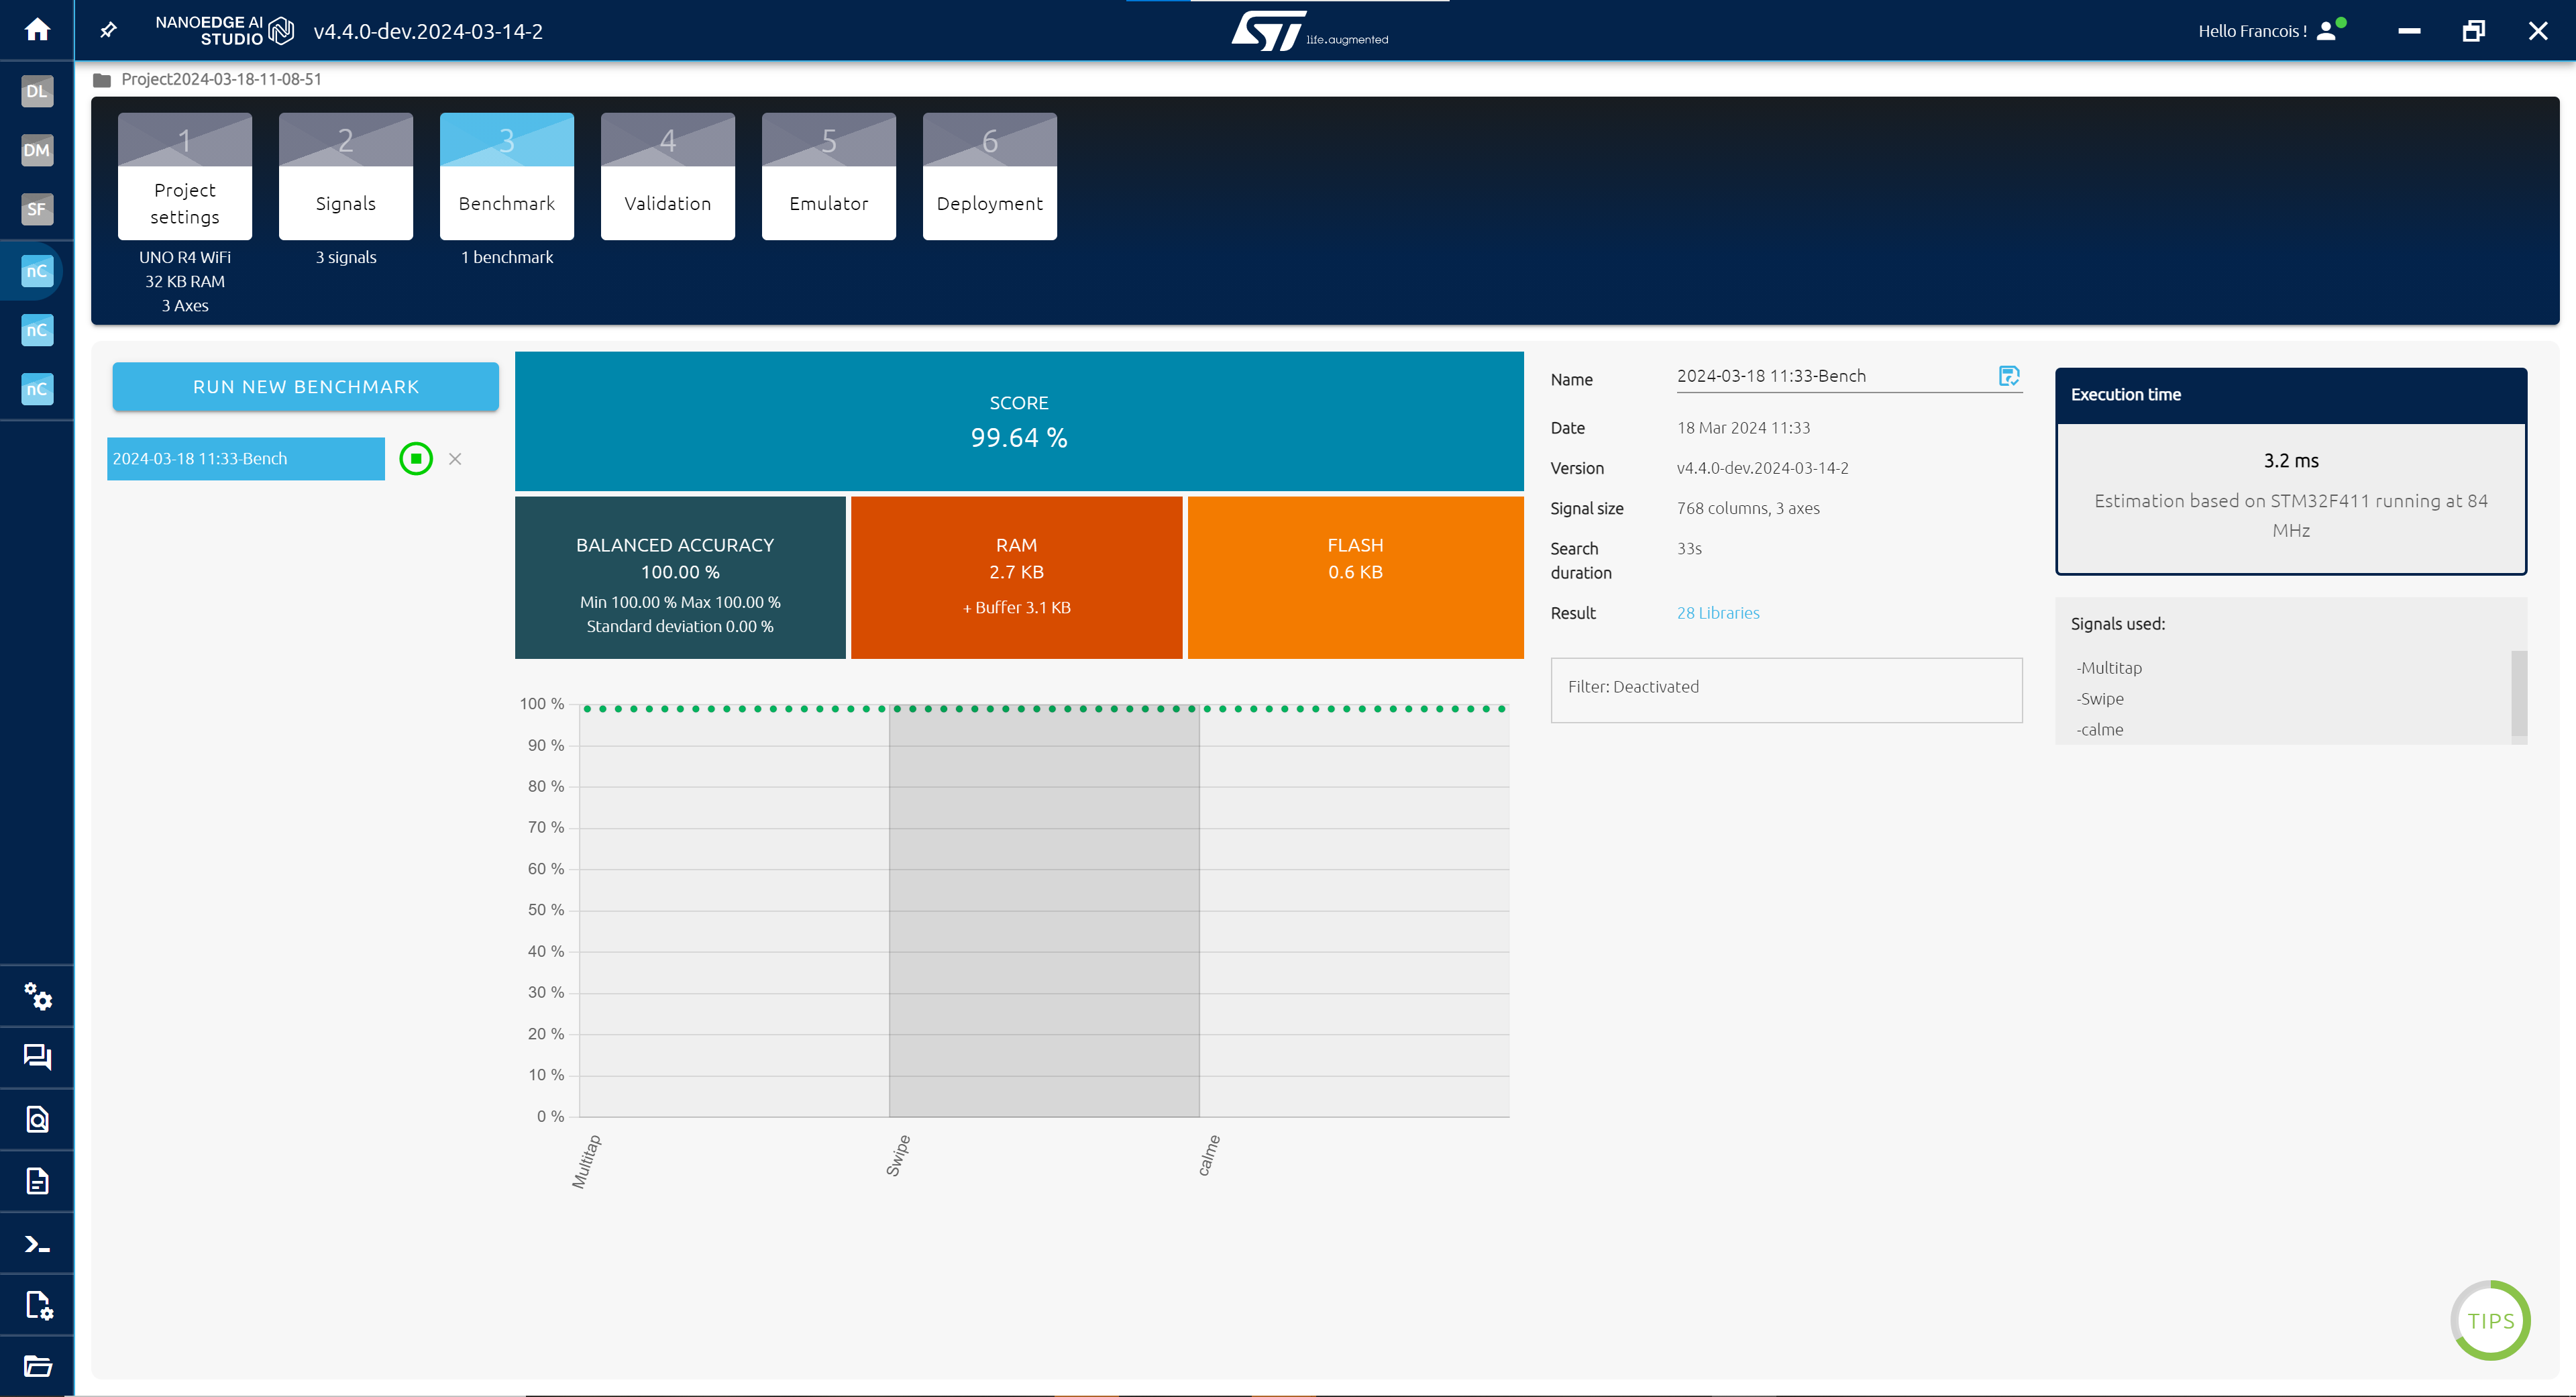
Once you have all the classses that you want to recognize, go to the Benchmark step.
- Click RUN NEW BENCHMARK.
- Select all your datasets and click START.
NanoEdge AI Studio will take your data and look for a model that is able to classify them. (it also applies pretreatment on its own to your data)
You get the accuracy of the model and its RAM and Flash requirements.
You should reach around 99% pretty fast if you collected good data. You can stop the benchmark when it happens.
In the validation step, you can compare the libraries (model + preprocessing) if you want, look here for more info:
$ https://wiki.st.com/stm32mcu/wiki/AI:NanoEdge_AI_Studio#Validation $
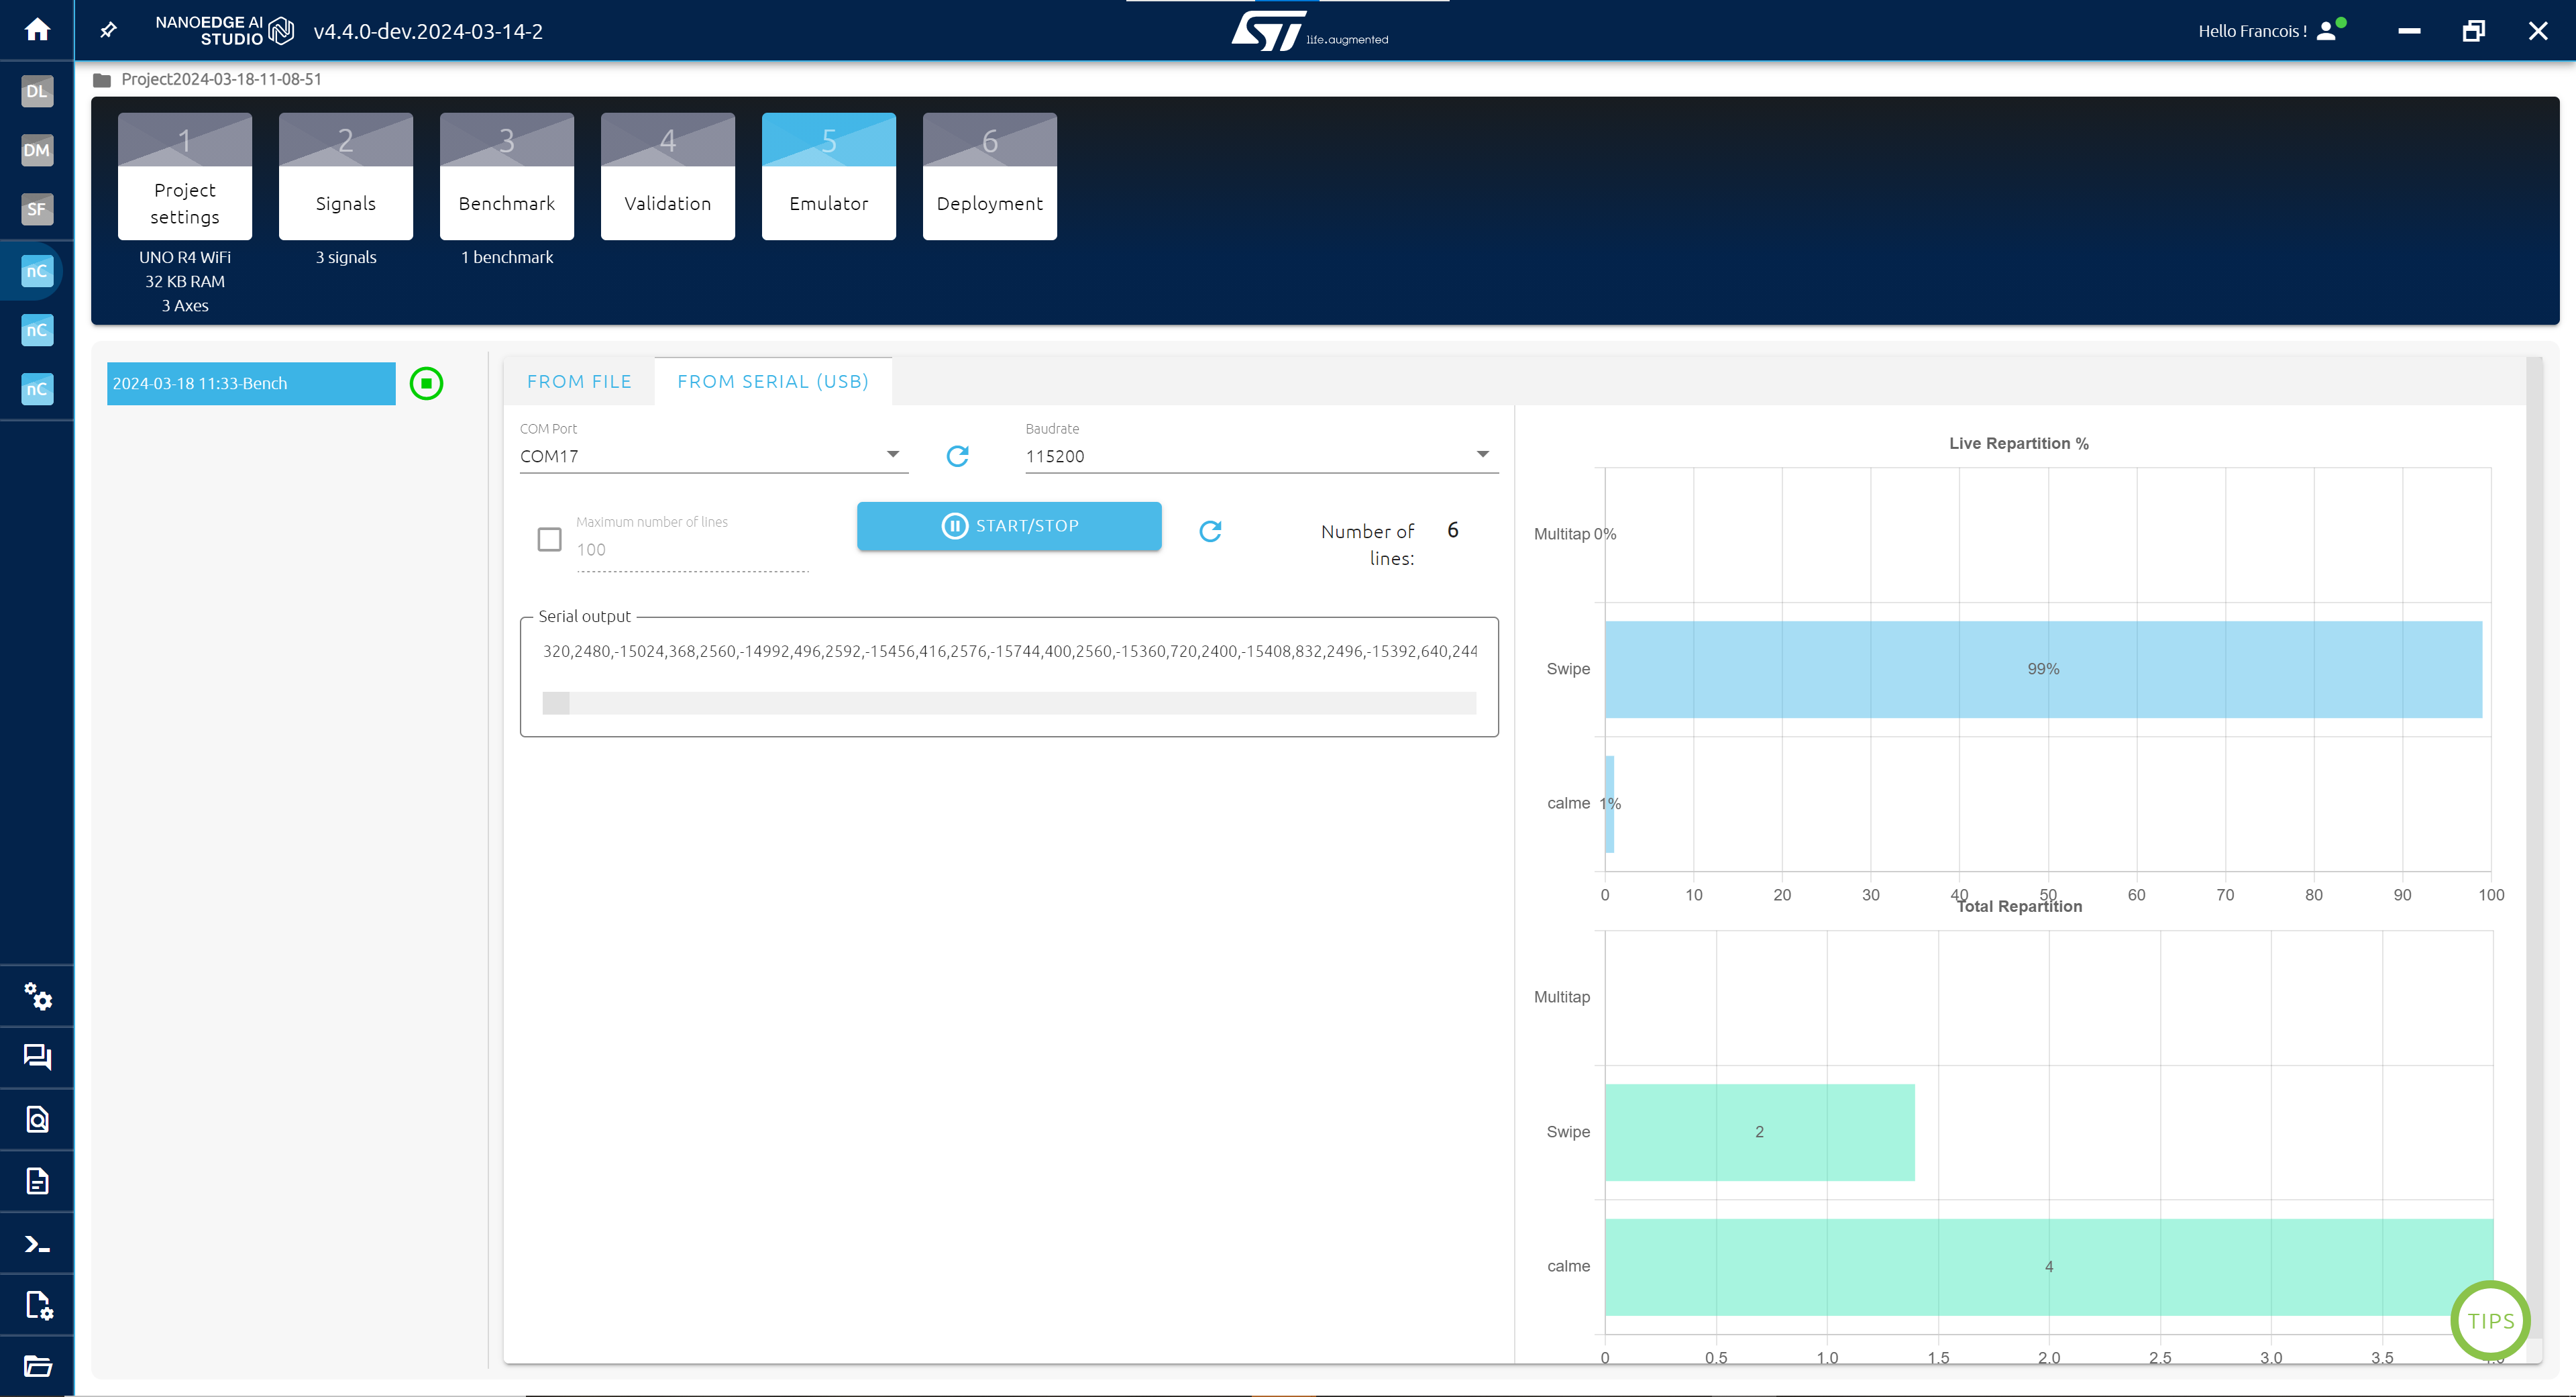
Test the model:
The emulator step is more useful for us here, you can use the serial to test the model directly in the tool:
- Click INITIALIZE EMULATOR
- Click FROM SERIAL
- Test your model with new real time data
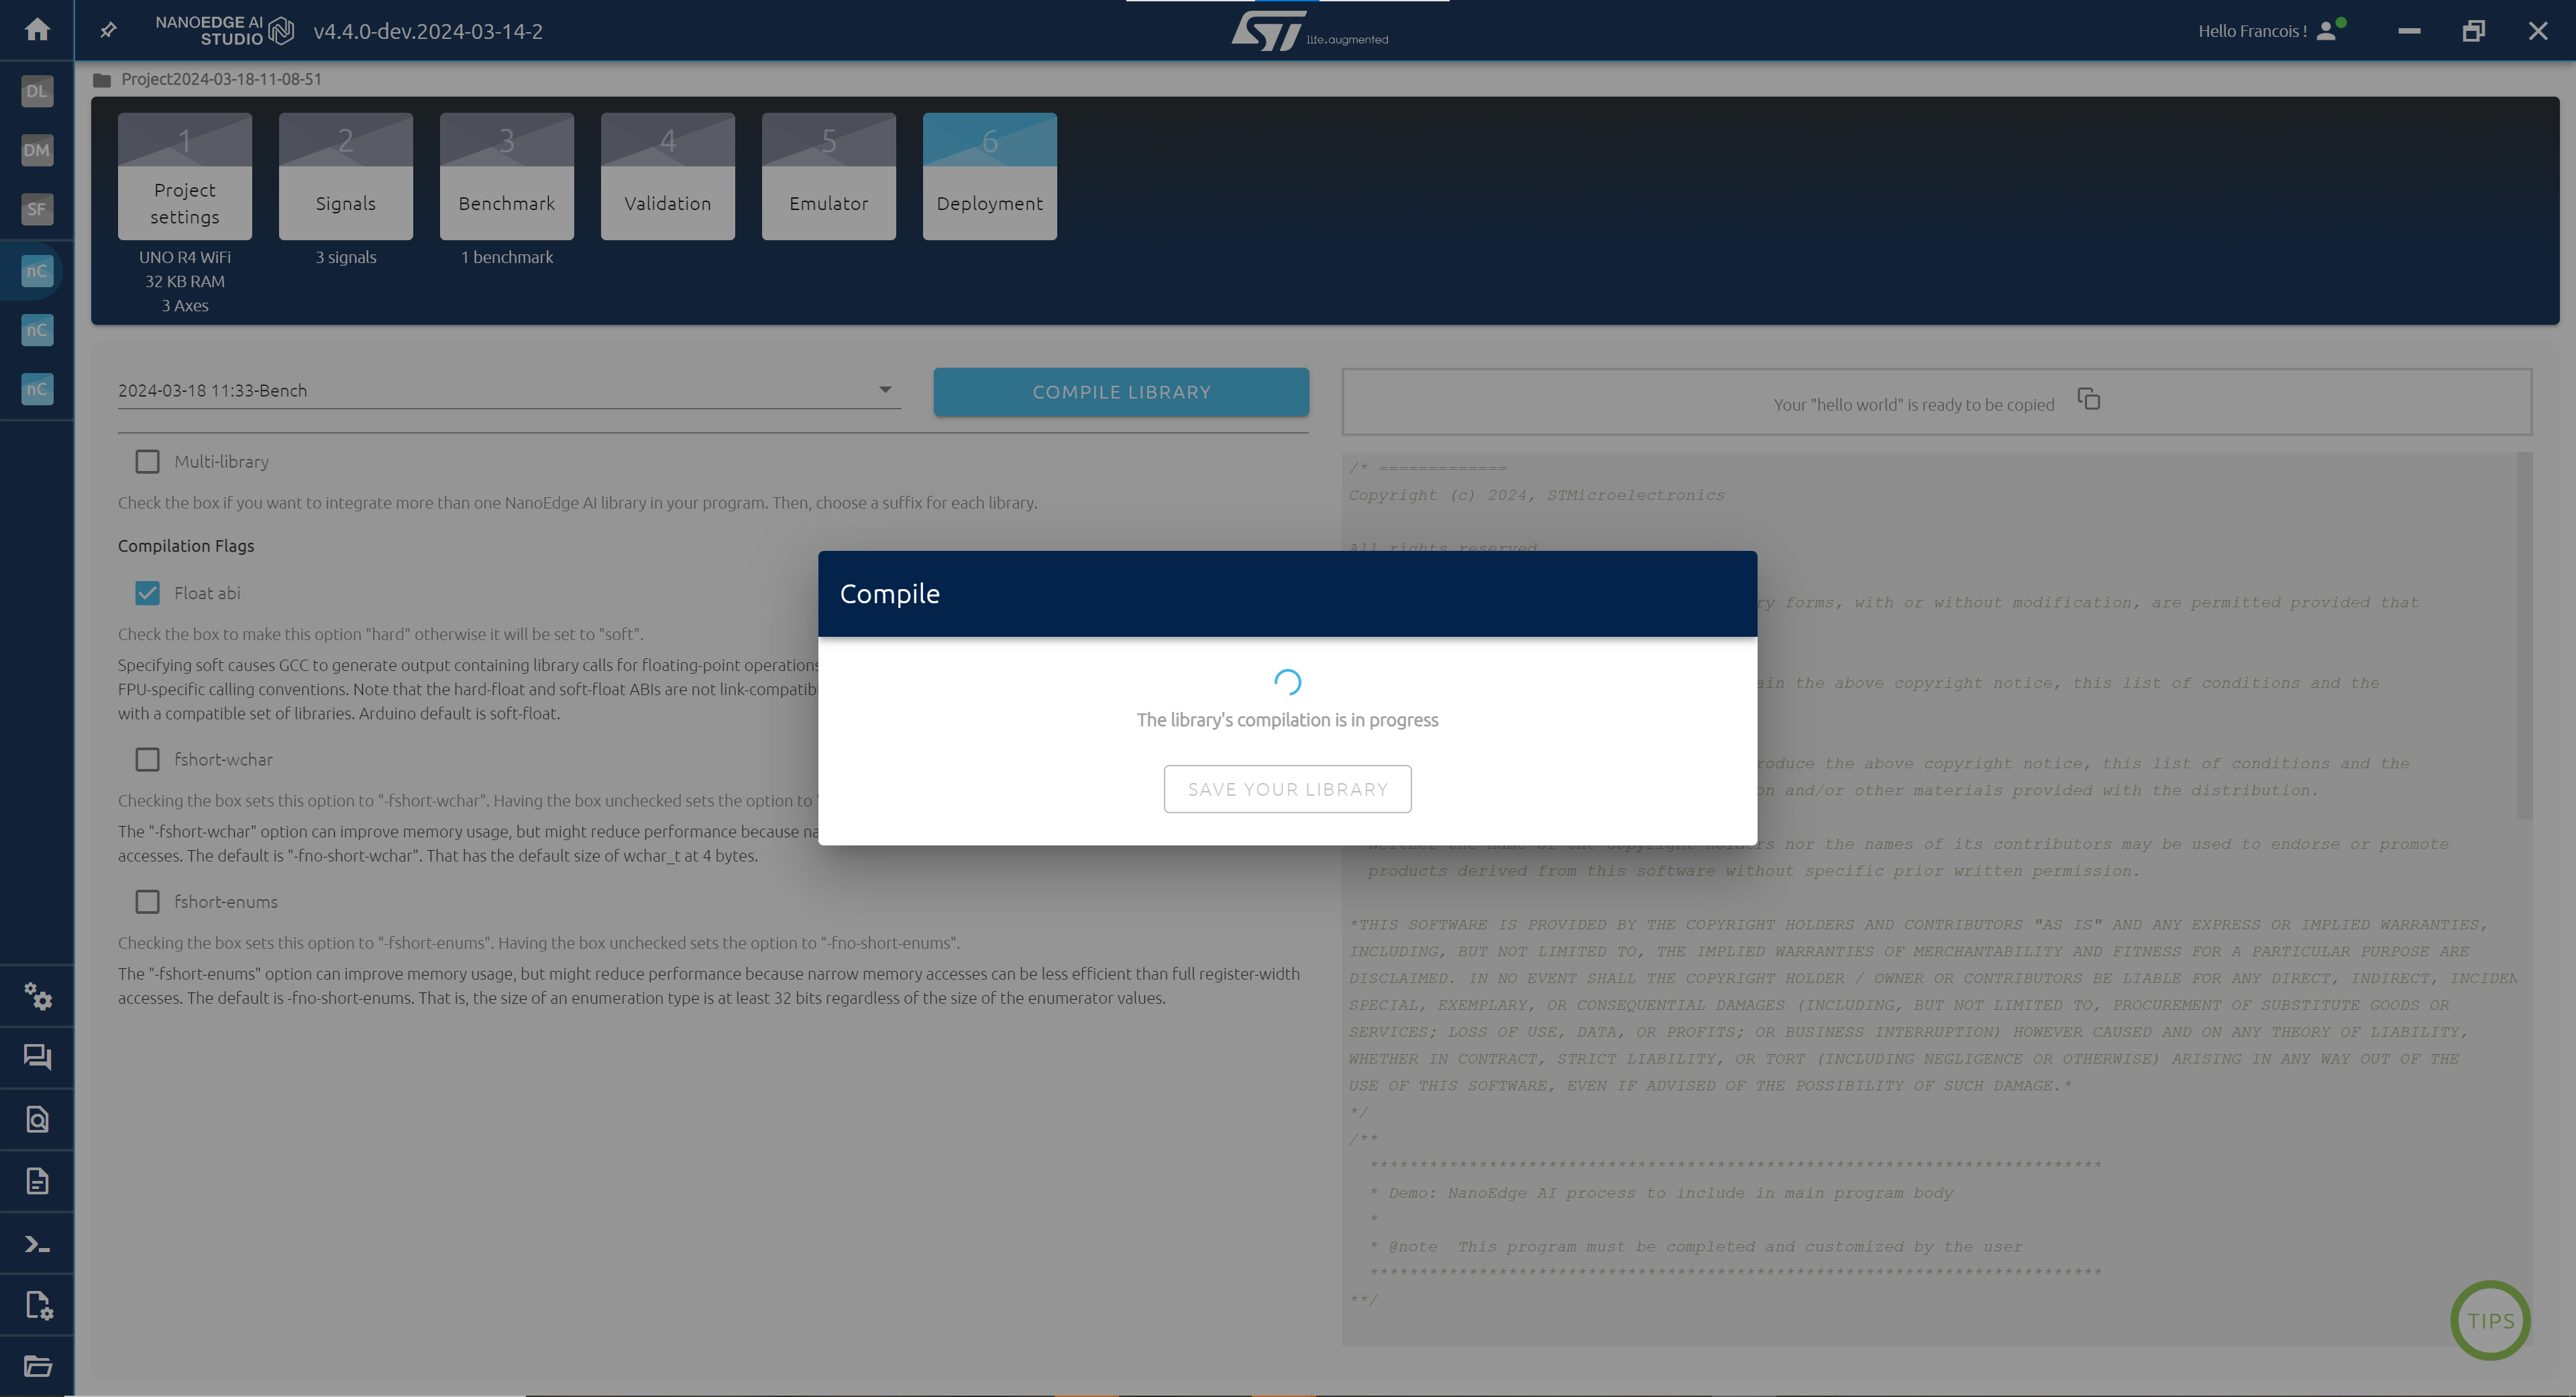
The last step in NanoEdge is to get the AI library that we will use in Arduino IDE:
- Click COMPILE LIBRARY
- Get and extract the .zip file
- The library is the .zip file in the folder Arduin , we will use it below:
Create the demo:
- Open a new project in Arduino IDE
- Get the main code below and paste it in your project
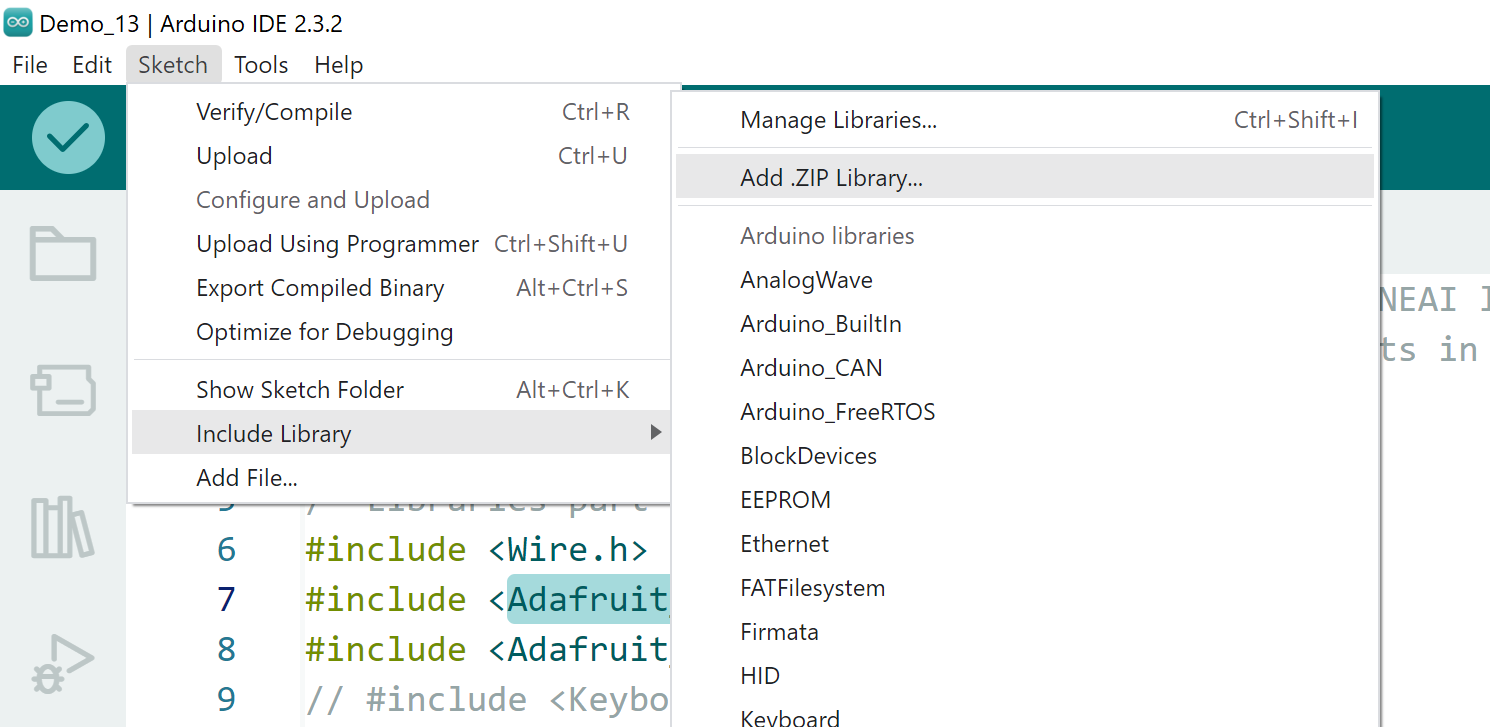
- Click on Sketch > Include Library > Adafruit_LIS3DH
- Add the Nanoedge AI Library (select the previously extracted zip):
- Compile the code.
- Flash the code.
It is finished, you can play with it.
Through this example, this tutorial shows how to add AI to an Arduino project using NanoEdge AI Studio. It is now up to you to think about other use case and do them on your own!
Code
Main code
c
The demo code
Data logger
c
Data logger code to collect data

0 Reviews
Your rating